Today, boys and girls (probably mostly girls) I’m going to show you how to turn this:
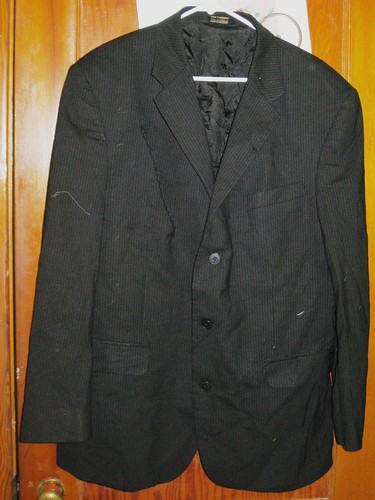
Raggedy, damaged men’s suit jacket into these:

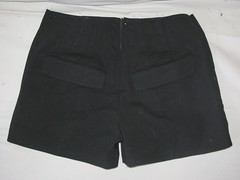
cute and cheeky women’s shorts.
Before we get into the slicin’ and dicin’ of this crafts hack, I have a word of disclaimer or two.
- This is not any sort of a correct way to sew. Seriously, many important, sane, real rules of How To Do It are about to be flagrantly disregarded. Newbie seamstresses, please, please, PLEASE do not take this as an example of good sewing technique, for it is not. Nothing about this is the Right Way To Do It. If you pulled shit like this in Home Ec, you’d flunk, if you tried this sort of shenanigan in 4-H, you’d get a hell of a talking to from your activities leader.
- This is a free tutorial for people to use for themselves. In light of the bullet point above, I think it would be highly irresponsible, plus also shitty practice to use this “technique” to make things to sell, so please, Do Not Try This on Etsy.
- Machine wash and dry the jacket before you ever begin to cut it up. This will pre-shrink the fabric and ensure that you can wash-and-wear these shorts henceforth. Totally important with summer clothes. And surprisingly, a lot of suiting machine washes JUST FINE.
So, with that out of the way, let the fun commence.
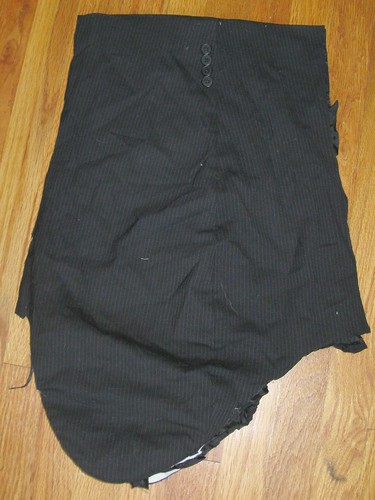
1. So, to begin, you must slaughter one freshly caught suit jacket. The best hunting ground for such is your local Goodwill, Oxfam, or equivalent. Find a particularly irredeemable old jacket and put it out of its misery like so:
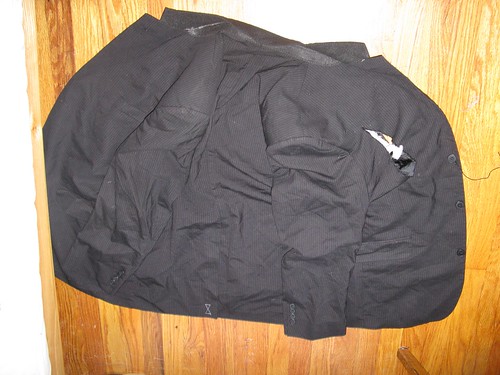
Lay it out so that the shoulder seams are up. Slice along the should seam until you reach the top of the armsceye. Cut around the sleeve, leaving it intact. You will need the sleeves soon.
Once the sleeves are cut out, you might as well fold the jacket in half as such, and lay it aside. Now, we’re on to the sleeves.
2. Slice your sleeve open along the shortest of the inner-arm seams.

Here’s a handy picture to elucidate what I’m talking about. You want to end up with the cuff buttons just off-center of the laid-out-flat sleeve. After both sleeves are laid open, pair them up, wrong sides together, matching up buttons. You may wish the pin the cuff edges together to keep them even. The cuff edges will be the finished waist of your shorts.
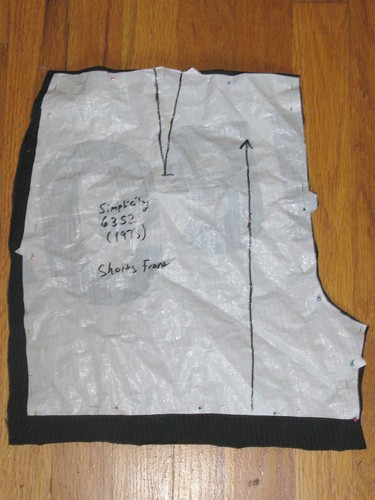
3. Pattern layout! If you are really prissy about grainlines and such, this is definitely not a good project for you. Because we will cavalierly disregard grainlines, among other essential rules of proper sewing. What we mostly want is the most amount of shorts for the least amount of sewing. We’ll re-use a lot of the finishing and tailoring of the original jacket, as you’ll soon see.
Lay out the shorts front sections so that the waistline of the shorts is lined up along the cuff edge of the flattened out sleeves.
Note about pattern selection: For this project you will need a pair of shorts meant to have a faced waist and a back zip. What with what will become the button trim, you end up with far too fussy of a front view on these shorts if you go with a fly opening.

And there’s not really a good straight run of fabric on a jacket for making a waistband. I suppose you could fashion a sectioned waistband out of the back of the jacket, but honestly, the whole point of these shorts is “as little sewing as possible” so it makes better sense to just go with the whole faced-waist thing.
Anyways:
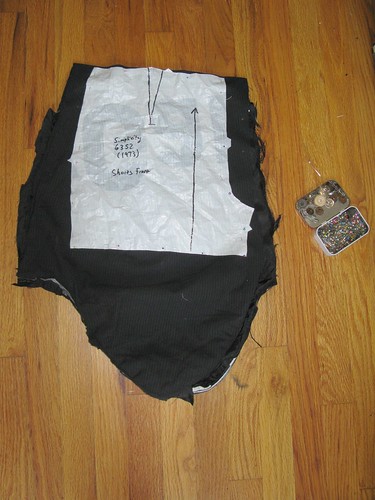
You’ll want to add about 1.5″ to the legs of the front sections of the shorts for a hem. I also added about an extra .5″ along the seamlines to accommodate for the lining, which I highly recommend you leave in and handle as an underlining.
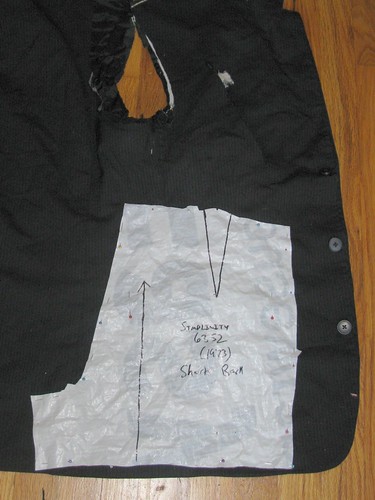
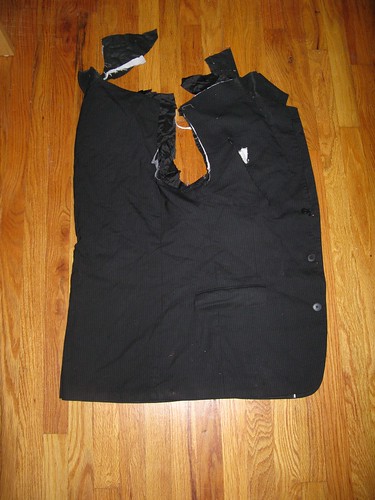
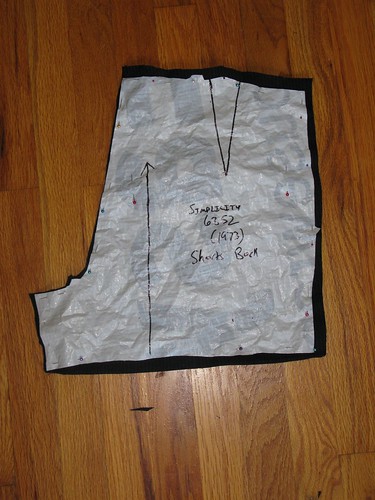
For the back of the shorts, the key thing is to line up your pattern so that the pocket flaps from the jacket fronts will be centered over each buttock. If you look at my photo closely, you will see two red straight pins marking where the pocket flaps are. Allow the finished edge of the bottom of the jacket to form the finished edge of the back shorts legs.
When you cut the shorts back sections out, leave an extra 5/8″ or so along the top edge to allow for finishing. Also, you may want to leave a little extra ease along the outside edge to accommodate for the lining, as with the front sections.
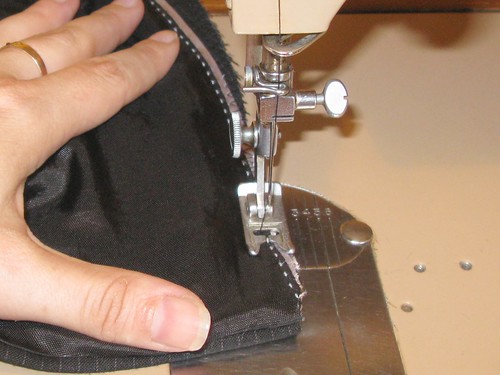
To keep the lining in place, as well as to reinforce/finish the raw edges of the fabric, I like to zig-zag stitch them together:
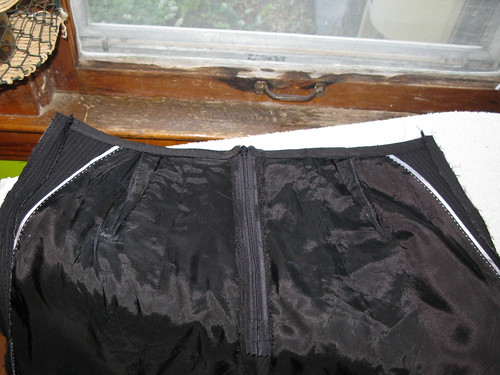
4. From here, you proceed mostly like normal in preparing the shorts. Make the darts. You may have to shuffle the front waistline darts to the outside or inside of the buttons or omit them entirely. You may have to make the back darts shallower so that they don’t interfere with the pocket. Sew the fronts together along center front seam, leaving about 2″ open at the crotch. Stitch the back together, leaving the zipper opening open and the last 2″ at the crotch, as you did with the fronts. Press seams. Install zipper as you normally would.
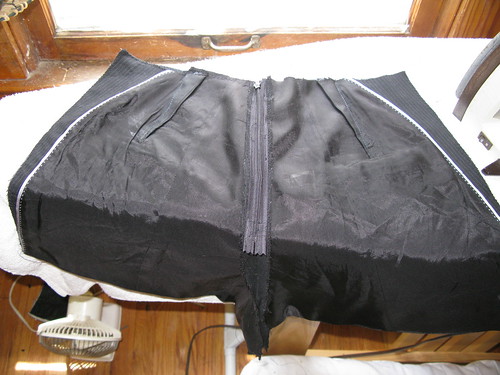
Looks pretty cool with that lining, doesn’t it?
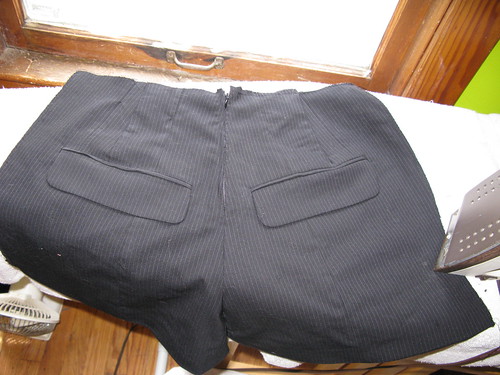
Outside view!
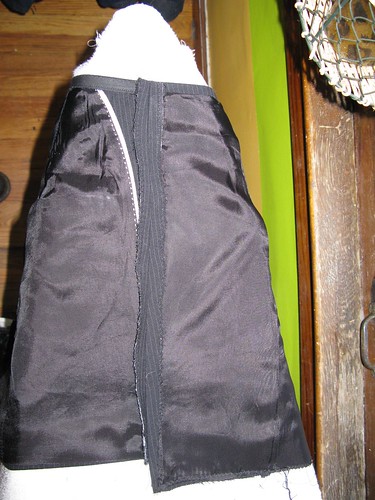
5. Now, it starts getting a bit unorthodox. The next step is to finish the back waist. I recommend bias binding tape.
That’s pretty nice, eh? Easy-peasy for the lazy seamstress in each of us, too.
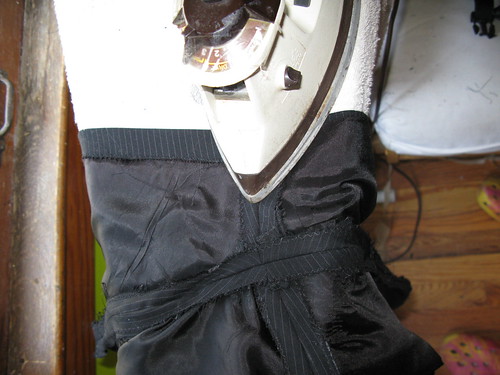
Okay, once that waistline is tidied up, you might as well join the front and back together along the side seams, like so:
Ah, there’s that extra 1.5″ I asked you to allow yourself. Very good.
All right. Go on and join the inseams, as you do. Sew shut the crotch. Right, all that’s taken care of?
Press up and and-hem the lower edge of the fronts, and you have a new pair of shorts for cheap or free.
Yay, shorts!
vava VOUM
That is awesome!
I love the cuff buttons as waist decorations
Thank you! It gives it a kind of retro 1940s pin-up feel, I think.